Key takeaways
- Switch off and unplug the appliance, then allow any hot condenser area to cool.
- Remove all ice from the bin, scoop, basket, and chute. Do not clean over usable ice.
- Drain the reservoir and remove washable parts such as the scoop, drip tray, or filter.
- Wipe away loose crumbs, dust, and visible slime before adding cleaner.
- Check the manual for a dedicated cleaning cycle and its exact water volume.
What's inside
In our home-appliance testing lab, we treat an ice maker as a food-contact appliance, not simply a cold-water machine. Mineral scale, slimy residue, and stale water can collect in the reservoir, chute, scoop, and internal water path. That buildup may affect flavor, slow production, increase noise, and make a countertop unit work harder than it should. Regular cleaning is one of the simplest ways to protect both ice quality and appliance performance.
This guide explains the safest, most effective cleaning routine for countertop, nugget, and built-in ice makers. We’ll cover how to choose a cleaner, how to descale without damaging nickel-plated parts, what to sanitize separately, and how often to repeat the process. Always check your model’s manual first, since manufacturer instructions take priority over any general method.
As an Amazon Associate we earn from qualifying purchases.




Our Recommended Picks
For routine household use, a nickel-safe tablet or liquid descaler is usually the most convenient choice. The Ice Machine Cleaner Maker and Descaler tablets offer a 24-count supply and are labeled for major brands, including countertop and commercial-style machines. Affresh Ice Machine Cleaner is another sensible option when the main concern is hard-water and mineral buildup, with a formula intended to improve the taste of finished ice.
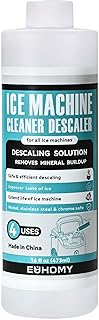
Households that clean frequently may prefer the 24-tablet ACTIVE Ice Machine Cleaner Maker Descaler, or the 36-pack Ice Machine Cleaner Descaler Tablets. Both are positioned as nickel-safe options for popular Frigidaire, Opal, GE Profile, and KitchenAid-style ice makers. For liquid dosing, EUHOMY Ice Machine Cleaner Descaler provides four uses per 16-fluid-ounce bottle. Larger machines or demanding maintenance schedules may call for the Nickel Safe 1 gal Ice Maker & Machine Cleaner, a food-grade descaler intended for mineral scale and lime.
1. Choose the Right Cleaner
Look for a product specifically labeled for ice makers and safe for the metals used in your machine. “Nickel safe” is particularly important for appliances with nickel-plated evaporator plates, which can be damaged by overly aggressive acids. Avoid substituting bathroom descaler, chlorine bleach, or general-purpose kitchen cleaner. Those products may leave residues, corrode components, or create unpleasant odors in a water-contact system.
Tablets are easy to store and portion, while liquid concentrates can be useful for larger reservoirs or machines with a clearly specified dilution ratio. Do not assume that a stronger mixture cleans better. Excess cleaner increases the rinsing burden and may conflict with the appliance manufacturer’s instructions.
2. Prepare the Ice Maker
- Switch off and unplug the appliance, then allow any hot condenser area to cool.
- Remove all ice from the bin, scoop, basket, and chute. Do not clean over usable ice.
- Drain the reservoir and remove washable parts such as the scoop, drip tray, or filter.
- Wipe away loose crumbs, dust, and visible slime before adding cleaner.
- Check the manual for a dedicated cleaning cycle and its exact water volume.
In testing, removing loose debris first made the chemical cleaning stage more consistent. It also prevented softened residue from being pushed into narrow water passages. If your unit has a water filter, remove or replace it according to the manufacturer’s directions; many filters should not be exposed to cleaning solution.
3. Run the Descaling Cycle
Add the recommended amount of cleaner to the specified volume of water. For a tablet, allow it to dissolve fully unless the label says otherwise. Start the appliance’s cleaning cycle, or follow the manual’s instructions for circulating the solution. Never force the unit to produce ice for consumption during this stage.
Pay attention to the solution’s appearance and the machine’s behavior. Cloudiness, flakes, or a mild mineral odor can be normal signs that scale is loosening. Stop immediately if you see unusual foaming, a sharp chemical smell, leaking, or an error code. When the cycle ends, drain the solution completely. Do not leave cleaner sitting in the reservoir longer than the product label or appliance manual allows.
4. Rinse and Clean Removable Parts
Rinsing is as important as descaling. Fill the reservoir with fresh water, run the machine’s rinse cycle if available, and drain it. Repeat until there is no cleaner odor and the water looks clear. Depending on the product and appliance, this may require two or more full rinses. The first batch of ice after cleaning should be discarded, even if it looks normal.
Wash removable plastic parts separately in warm water with a small amount of mild dish soap. Use a soft cloth or non-abrasive brush around the chute, bin corners, and gasket. Avoid steel wool, scouring powder, and sharp tools, which can scratch surfaces and create places for residue to collect. Never immerse the main electrical housing unless the manual explicitly permits it.
5. Sanitize and Prevent New Buildup
Descaling removes mineral deposits, but it is not always the same as sanitizing. If the manual specifies a separate food-safe sanitizer, use only that product and follow its contact-time instructions. Otherwise, clean touch points and removable parts as directed by the manufacturer rather than improvising a bleach mixture. After the final rinse, dry accessible surfaces with a clean towel and leave the lid or door open briefly so the interior can air-dry.
Frequency depends on water hardness, usage, and the appliance’s design. A heavily used machine in a hard-water area may need cleaning monthly; a lightly used unit may be fine every three to six months. Clean sooner if ice tastes metallic, production slows, flakes appear, or the reservoir develops a film.
Tips
- Keep a dated cleaning note on the appliance or in your phone so maintenance does not become guesswork.
- Use filtered water if the manual allows it; filtration can reduce, but not eliminate, mineral scale.
- Empty and dry the machine before storing it for an extended period.
- Clean the ice bin and scoop regularly, since hands and dust can re-contaminate a freshly cleaned system.
Frequently Asked Questions
Can I use vinegar to clean an ice maker?
Vinegar may loosen some mineral deposits, but it is not automatically approved for every appliance. It can leave an odor, and its effectiveness varies with the type of scale. Use a purpose-made ice-maker cleaner when the manufacturer recommends one, and never mix vinegar with bleach or other chemicals.
How many rinse cycles are necessary?
There is no universal number. Follow the cleaner and appliance instructions, then continue rinsing until the water is clear and free of chemical smell. Discard the first ice-making batch after cleaning as an additional precaution.
Why does my ice still taste odd after cleaning?
Possible causes include incomplete rinsing, an old water filter, a dirty bin or scoop, stagnant water, or odors absorbed from the surrounding area. Repeat the rinse procedure, wash removable parts, replace the filter if due, and check whether the water source itself has an unusual taste.
Can I clean a built-in ice maker the same way as a countertop model?
The principles are similar, but the cycle, access points, and cleaner quantity may differ. Built-in and commercial-style machines often require a specific branded procedure. Consult the manual before removing panels or pouring solution into a reservoir that is not designed for user access.
Conclusion
The best way to clean an ice maker is a measured routine: remove old ice, use a compatible nickel-safe cleaner, run the approved descaling cycle, rinse thoroughly, wash removable parts, and discard the first fresh batch. Choosing the right product matters, but careful dosing and complete rinsing matter just as much. With regular maintenance tailored to your water quality and usage, your ice maker should stay cleaner, quieter, and more reliable.