Key takeaways
- Cleaning while warm. Steam burns and paint damage result, and the thermostat may restart the element if the switch was left on.
- Spraying any liquid at the control housing. Thermostats and timers short easily and the housing is not sealed.
- Using a metal scraper or abrasive pad on the fins. Scratches through the paint start rust on steel fins.
- Laying the unit on its side or upside down. Oil can migrate into the header and the unit may gurgle or heat unevenly for hours.
- Hosing it down outdoors. Water enters the housing and the base, and mineral spots stain the paint.
- Using solvent or degreaser. It attacks the rubber seals at the fin joints.
- Skipping the cord inspection. A cord with cracked insulation on a 12.5 amp appliance is a fire risk regardless of how clean the fins are.
An oil-filled radiator spends eight months a year in a closet or under a bed collecting dust, then gets plugged in on the first cold night. That first hour is when things go wrong. Dust packed between the fins scorches and smells like burning hair, the thermostat reads the trapped heat and cycles early so the room never warms, and a thick blanket of lint over the control housing can push internal temperatures to the point where the overheat cutoff trips or, on an older unit without one, the wiring degrades. Cleaning it badly is its own hazard: spraying water or cleaner near the control box, tipping a 20 to 30 pound unit onto its side while hot, or scraping the fins with a metal tool can cause a short, a leak, or a dent that stresses the sealed oil chamber.
A safe, thorough cleaning takes about 30 minutes plus cooling time, needs no chemicals stronger than dish soap, and should happen before the heater’s first use each season.
Our top picks


As an Amazon Associate we earn from qualifying purchases at no extra cost to you.
What You Need
| Item | Why | Optional? |
|---|---|---|
| Vacuum with brush and crevice attachments | Pulls dust from between fins and out of the control housing vents without touching wiring | No |
| Microfiber cloths (2 or 3) | One barely damp for the fins, one dry to follow, one for the base and wheels | No |
| Soft paintbrush or radiator brush (1 to 2 inches wide, long bristles) | Reaches the narrow gaps between fins where the vacuum cannot | Yes, but it is the most useful tool for fin spacing under 1 inch |
| Small bowl of warm water with a drop of dish soap | Lifts greasy film from the fins in kitchens or near cooking areas | Yes |
| Can of compressed air | Clears dust from the control panel vents and thermostat slot | Yes |
| Flashlight | Shows dust buildup at the bottom of fin channels and around the base | Yes |
| Old towel or drop cloth | Protects the floor from dust and the few drops of water used | Yes |
No coil cleaner, degreaser, or solvent belongs on an oil-filled radiator. The fins are painted steel and the seals are rubber; a damp cloth and a brush are all the chemistry required. A typical 1,500 watt unit, such as the CAYNEL oil-filled radiator with thermostat and 24 hour timer at about $57, has 7 to 11 fins, weighs 18 to 26 pounds, and stands about 25 inches tall, so plan the work space accordingly.
Step-by-Step
1. Unplug and cool completely (60 minutes if recently used)
Switch the heater off, unplug it, and wait. An oil-filled radiator that has been running holds heat for an hour or more; the fins can stay above 150 degrees Fahrenheit for 30 to 45 minutes. Touch the top of a middle fin with the back of your hand; if it is warmer than room temperature, wait longer. Never clean a warm unit with a damp cloth, since water flashing to steam on hot steel can scald and thermal shock stresses the paint.
2. Move it to open floor and lay down a towel (2 minutes)
Roll or carry the unit onto a hard floor with a towel underneath. Keep it upright; tipping an oil-filled radiator on its side is allowed for most models only when cold, and even then it is unnecessary for cleaning. Lock the wheels if they have locks.
3. Vacuum the fins top to bottom (5 minutes)
Fit the brush attachment and run it down the outside faces of each fin, then along the tops and bottoms. Switch to the crevice tool and draw it slowly down each gap between fins, both sides of the unit. Dust here is heaviest in the bottom third where the fins meet the base. Keep the nozzle a half inch off the metal so you do not scratch the paint.
4. Brush out the fin gaps (5 minutes)
Slide the paintbrush into each gap and work it up and down while holding the vacuum crevice tool just below to catch what falls. The gaps on most units are 3/4 to 1 inch wide, and a long-bristle brush reaches the full depth, typically 4 to 6 inches. This is where the burning smell comes from, so be thorough.
5. Clean the control housing without water (3 minutes)
The plastic box on one end holds the thermostat, timer, and switches. Vacuum its vent slots with the brush tool and, if you have it, blow compressed air through the slots in short bursts from 6 inches away. Wipe the outside of the housing and the knobs with a dry cloth only. Never spray liquid on or near the housing, and do not open it; there are no user-serviceable parts inside.
6. Wipe the fins with a barely damp cloth (5 minutes)
Dip a microfiber cloth in the warm soapy water and wring it until it is almost dry. Wipe each fin face top to bottom, refolding the cloth as it grays. For grime that resists, let the damp cloth rest on the spot for 30 seconds before wiping. Follow immediately with a dry cloth. The goal is to remove the film that a vacuum leaves, not to wet the metal.
7. Clean the base, cord, and wheels (3 minutes)
Wipe the base plate and the top of the wheel brackets. Run a dry cloth along the full cord, feeling for cracks or soft spots in the insulation and checking that the plug prongs are straight and clean. Pull hair and carpet fibers from the wheel axles; a wheel that does not turn makes people drag the unit, which strains the cord.
8. Inspect for leaks or damage (2 minutes)
With a flashlight, look along the seams where fins join the header at the top and bottom for any oily residue, and check the floor under where the unit sat all summer. A dark oily patch means the sealed chamber has failed and the heater must be retired. Look for dents in fins, a wobbly control housing, or a cracked base.
9. Dry and test (10 minutes)
Let the unit stand 10 minutes so any surface moisture evaporates. Plug in, set the thermostat to maximum, and run on the low setting for 5 minutes in a ventilated room. A faint warm-dust smell for the first few minutes of the season is normal; a sharp acrid smell or visible smoke is not, and means dust remains in a fin gap or the housing. Shut it down, cool, and repeat steps 3 to 5.
Mistakes to Avoid
- Cleaning while warm. Steam burns and paint damage result, and the thermostat may restart the element if the switch was left on.
- Spraying any liquid at the control housing. Thermostats and timers short easily and the housing is not sealed.
- Using a metal scraper or abrasive pad on the fins. Scratches through the paint start rust on steel fins.
- Laying the unit on its side or upside down. Oil can migrate into the header and the unit may gurgle or heat unevenly for hours.
- Hosing it down outdoors. Water enters the housing and the base, and mineral spots stain the paint.
- Using solvent or degreaser. It attacks the rubber seals at the fin joints.
- Skipping the cord inspection. A cord with cracked insulation on a 12.5 amp appliance is a fire risk regardless of how clean the fins are.
How Often
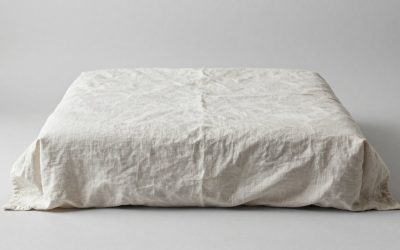
Do the full cleaning once at the start of heating season and once at the end before storage. During the season, run the vacuum brush over the fin faces every two to three weeks, more often in a bedroom with pets or a room with carpet, since the convection current pulls floor dust up through the fins constantly. Check the control housing vents monthly with a flashlight. If the heater is stored somewhere dusty, drape a cotton sheet over it, never plastic, which traps moisture against the metal. A radiator cleaned on this schedule runs cooler at the housing, cycles more accurately, and keeps its finish for 10 to 15 years.
When to Call a Pro or Replace
Oil-filled radiators are sealed appliances and are not economically repairable; a service call costs more than a new $50 to $90 unit. Retire the heater if you find any oil residue at a seam or on the floor (the chamber is breached and cannot be resealed), if the cord or plug is damaged, if the thermostat no longer cycles and the unit runs continuously at full power, if the tip-over switch fails to cut power when the unit is tilted, or if there is a persistent electrical smell after a thorough cleaning. A unit made before overheat and tip-over protection were standard, roughly anything over 12 to 15 years old, is worth replacing on safety grounds alone; current models in 2026 include both protections, a 24 hour timer, and multiple power modes for well under $100.
FAQ
Why does my oil-filled heater smell like burning when I first turn it on?
Dust that settled between the fins over the summer is scorching. Turn the unit off, let it cool, and vacuum and brush the fin gaps. A new unit can also emit a mild smell for the first hour as manufacturing oils burn off the paint, which is normal and fades.
Can I use a damp cloth on the heater at all?
Yes, on the painted fins only, wrung nearly dry, with the unit unplugged and fully cool, followed by a dry cloth. Keep all moisture away from the control housing, switches, and cord entry point.
Does the oil ever need to be refilled or changed?
No. The diathermic oil is sealed in at the factory and is never consumed. If the level drops, the chamber has leaked and the unit should be replaced, not refilled.
Is it safe to store the heater on its side?
Store it upright. Some manufacturers permit brief tilting for transport when cold, but storing on its side for months lets oil settle away from the element and can cause uneven heating or gurgling noises when it is next used.