Key takeaways
- Use a dedicated bucket for cleaning solutions so it is not confused with a drinking-water container.
- Label the date of each filter change and deep clean with removable tape.
- Keep the dispenser at least a few inches from the wall so ventilation openings remain clear.
- If water tastes chemical after flushing, stop using the unit and rinse again rather than masking the taste with flavoring.
What's inside
A water dispenser can look spotless while harboring mineral scale, biofilm, and residue around the spout, drip tray, reservoir, or bottle seat. In a home-appliance testing lab, we treat cleaning as both a hygiene task and a performance check: buildup can restrict flow, affect taste, make pumps work harder, and shorten the life of valves and heating or cooling components.
This guide explains the safest way to clean top-load, bottom-load, and countertop dispensers, which tools are worth keeping on hand, and how often to repeat the job. It also covers descaling, filter replacement, narrow openings, and the signs that a dispenser needs more than routine maintenance.
As an Amazon Associate we earn from qualifying purchases at no extra cost to you. Product prices and availability are accurate as of the date shown and are subject to change.




🛒 Best Price Today on Amazon
Prime members get fast, free shipping on everything above, plus member-only deals. New members get a 30-day free trial — cancel anytime.
Recommended picks
Choose equipment that matches the dispenser you own. A dedicated Water Cooler Cleaning Kit is useful for routine sanitizing, while Renuv Citric Acid is better suited to mineral scale in hard-water areas. For bottle and reservoir openings, the Holikme Bottle Brush Tube Cleaning Lab Set provides several long, narrow brushes. If your setup uses filtered drinking water, the Waterdrop WFD-22L Large Water Filter Dispenser offers a high-capacity pitcher format; the compact Brita Metro Water Filter Pitcher is easier to fit in a refrigerator. For a floor-standing unit, the Brio 520 Bottom Load Water Cooler provides hot, cold, and room-temperature dispensing with a two-stage filter system.
Before you start: identify the dispenser and unplug it
Check whether your appliance is top-loading, bottom-loading, or a countertop reservoir model. Read the manufacturer’s cleaning instructions first, particularly if the unit has a built-in filter, ultraviolet feature, electronic display, or self-cleaning cycle. Remove the water bottle or empty the reservoir, then unplug the dispenser. If it has a hot-water function, allow the heating tank to cool fully before draining it. Dispense water from every outlet into a container until the flow stops, and keep the water away from electrical controls.
Prepare clean towels, a bucket, mild dish soap, a soft cloth, and a soft bottle or tube brush. Avoid abrasive pads, bleach unless the manual specifically permits it, and mixtures of different cleaning chemicals. Never combine acids with chlorine-based products.
Clean the removable parts first
Remove the drip tray, grille, bottle support collar, splash guard, and any detachable faucet covers. Wash these parts in warm water with a small amount of dish soap, using a narrow brush for grooves and drain channels. A tube-cleaning brush is especially helpful around spout caps and small openings where a sponge cannot reach. Rinse thoroughly so detergent does not enter the drinking-water path, then air-dry or dry with a fresh towel.
Wipe the exterior with a damp microfiber cloth. Pay close attention to the button area, handles, bottle shelf, and the underside of the dispensing nozzles. Do not spray liquid directly onto the control panel or into the vents.
Sanitize the water path
Use a dispenser cleaner according to its label and the appliance manual. Add the prepared solution to the reservoir or bottle seat, allowing it to contact the internal water path for the stated dwell time. For a bottom-loading model such as the Brio 520, follow the instructions for its pump and internal tanks rather than forcing liquid through the system.
Dispense the solution through each outlet, collecting it in a bucket. If the unit has separate hot and cold tanks, operate the controls only as the manufacturer directs; some appliances require the hot tank to remain off during cleaning. Drain the solution completely, refill with fresh drinking water, and flush every outlet several times. Continue until there is no cleaner smell or taste. Wash your hands before reinstalling clean parts and a fresh bottle.
Remove limescale without damaging the appliance
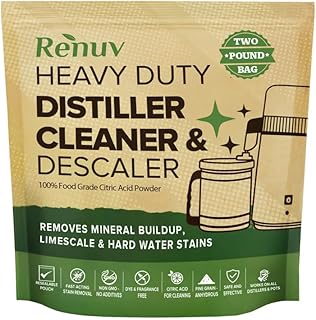
White crust, reduced flow, noisy heating, or a stiff faucet usually indicates mineral scale. Citric acid, such as Renuv Citric Acid for Cleaning & Descaling Water Distillers, can dissolve scale when the manual allows acid descaling. Dissolve the recommended amount in water, apply it only to approved internal or removable components, and respect the contact time. Do not use concentrated acid, boiling solution, or metal tools to chip deposits away.
After descaling, flush the appliance repeatedly with clean water. Taste and odor are practical checks, but they should not replace the manufacturer’s rinse instructions. If scale returns quickly, consider a filtered supply or a dispenser with a replaceable filter. Pitchers such as the Waterdrop WFD-22L or Brita Metro can reduce the mineral and chlorine load before water reaches a compatible appliance, although they do not remove the need for cleaning.
Filters, bottles, and cleaning frequency
Replace internal filters on the schedule printed by the manufacturer, or sooner if water flow slows, taste changes, or the filter has reached its rated capacity. Do not rinse and reuse disposable cartridges unless the instructions explicitly permit it. Wash reusable bottles and caps separately, and never refill a bottle that has developed a persistent odor, visible film, or cracks.
For most homes, wipe the exterior and drip tray weekly, wash removable parts every one to two weeks, and sanitize the water path about every three months. Increase the frequency in warm rooms, high-use households, offices, or areas with hard water. A dispenser that sits unused for several days should be emptied and flushed before use.
Tips
- Use a dedicated bucket for cleaning solutions so it is not confused with a drinking-water container.
- Label the date of each filter change and deep clean with removable tape.
- Keep the dispenser at least a few inches from the wall so ventilation openings remain clear.
- If water tastes chemical after flushing, stop using the unit and rinse again rather than masking the taste with flavoring.
Frequently Asked Questions
Can I use vinegar to clean a water dispenser?
Only if the manufacturer permits it. Vinegar can help with some mineral deposits, but its odor may linger and its acidity may not be suitable for every seal, pump, or internal coating. A manufacturer-approved citric-acid descaler is often easier to measure and rinse away.
How do I clean a dispenser that has a built-in filter?
Remove or bypass the filter during cleaning if the instructions call for it. Cleaning chemicals can saturate a cartridge and leave an unwanted taste. Install a new filter after the system has been flushed, and reset the indicator if the dispenser has one.
Why is my water dispenser making cloudy water after cleaning?
Small bubbles can make freshly dispensed water look cloudy and should clear within a few minutes. Persistent cloudiness, particles, or a chemical smell suggests incomplete rinsing, scale breaking loose, a dirty bottle, or a failing filter. Stop drinking from the unit until the cause is identified.
When should a dispenser be replaced instead of cleaned?
Consider replacement when leaks persist, the pump cannot maintain flow, electrical controls behave unpredictably, or mold-like odor returns after thorough cleaning and new filters. Cracked food-contact plastic and damaged tubing are also reasons to retire the appliance rather than attempt a cosmetic fix.
Conclusion
The best way to clean a water dispenser is to unplug it, drain it, wash removable parts, sanitize the internal path with an approved product, descale only when appropriate, and flush thoroughly. Regular filter changes and scheduled cleaning prevent most taste, flow, and hygiene problems. The right brush, cleaner, and descaler make the process faster, but the appliance manual should always determine which solutions and procedures are safe.