Key takeaways
- Using bleach on the coil. It corrodes aluminum fins and copper tubing and the fumes are hazardous in a confined cabinet.
- Pressure washing. Even a low setting folds fins flat and can drive water into the motor.
- Skipping the drain pan. The coil looks clean but the mold reservoir below it reseeds the unit in weeks.
- Rinsing across the fins instead of along them. It bends fins and traps debris.
- Powering up while damp. Water on the capacitor or board can short the unit or trip a breaker.
- Forgetting to tilt the unit on reinstall. Standing water in the pan is what started the mold.
- Cleaning only the evaporator. A dirty condenser coil at the back raises power draw by 10 to 20 percent.
Mold on window air conditioner coils is not a cosmetic problem. The evaporator coil sits wet for months, the fan pushes air across it, and every spore that grows there gets delivered to the room. Clean it badly and you make things worse: bleach on aluminum fins corrodes them and releases fumes, a pressure washer folds the fins flat and cuts airflow permanently, and spraying water into the control panel kills a $150 to $350 unit in one afternoon. Skipping the drain pan means the mold comes back in two weeks because the source was never touched.
Done right, the job takes about two hours plus drying time, costs $15 to $25 in cleaner, and leaves you with a unit that cools better, smells clean, and draws less power. Here is the full procedure.
Our top picks
As an Amazon Associate we earn from qualifying purchases at no extra cost to you.
What You Need
| Item | Why | Optional? |
|---|---|---|
| Foaming coil cleaner, 19 oz can ($14 to $18) | Formulated to lift mold and grime from aluminum fins without corrosion; foam clings and rinses out with condensate | No |
| Screwdriver set (Phillips and flat) | Removes the front grille, filter housing, and outer cabinet screws | No |
| Fin comb ($8 to $15) | Straightens bent fins that block airflow | Yes, but worth it on any unit over two years old |
| Soft brush and vacuum with brush attachment | Removes loose dust before the cleaner goes on | No |
| Spray bottle of water or a garden hose on gentle mist | Rinses the cleaner and mold off the coil | No |
| Nitrile gloves, N95 mask, safety glasses | Mold spores and cleaner spray are respiratory and eye irritants | No |
| Plastic sheeting or a tarp and a bucket | Catches the dirty rinse water and protects the floor if you work indoors | Yes |
| Hydrogen peroxide (3 percent) in a spray bottle | Treats the drain pan and plastic housing where foam cleaner is not meant to go | Yes |
| Small pipe cleaner or zip tie | Clears the drain hole and channel | No |
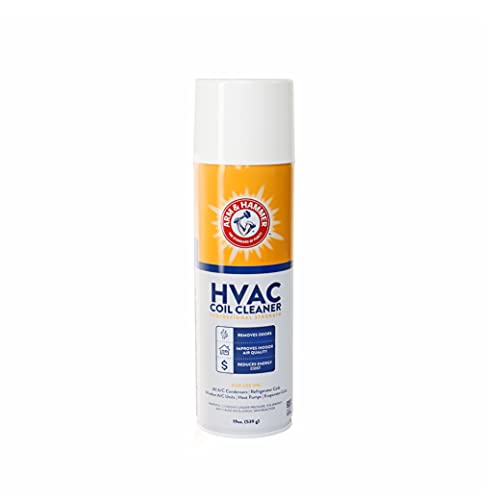
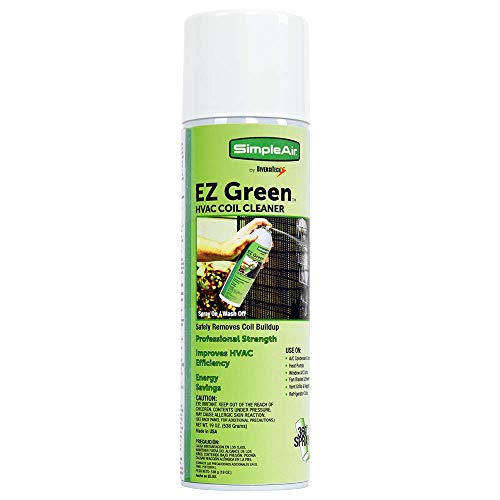
Both the Arm and Hammer coil cleaner foam at about $18 and the SimpleAir EZ Green foam at about $14 are biodegradable, no-rinse-required formulas in 19 ounce cans, and one can is enough for two full cleanings of a 5,000 to 8,000 BTU unit. The SimpleAir has a 360 degree nozzle, useful for reaching the back of the coil in a tight cabinet.
Step-by-Step
1. Unplug and remove the unit from the window (15 minutes)
Unplug the air conditioner and let it sit 10 minutes for any residual charge to dissipate. Remove the window side panels and the top rail, then slide the unit inward with a helper; 5,000 BTU units weigh 36 to 45 pounds and 8,000 BTU units 50 to 70. Carry it outdoors to a driveway, patio, or lawn if at all possible. If you must work indoors, lay plastic sheeting and set the unit on a raised surface so you can tip it toward a bucket.
2. Remove the front grille and filter (5 minutes)
Pull or unclip the front grille. Slide out the mesh filter and set it aside; wash it later in the sink with dish soap. Take a photo of the control panel wiring and the cabinet screws before going further.
3. Slide off the outer cabinet (10 minutes)
Most units have 4 to 8 screws along the bottom edge and back holding the metal cabinet to the base. Remove them and slide the cabinet straight back and off. You now see the evaporator coil at the front (the one facing the room), the fan and motor in the middle, and the condenser coil at the rear. The mold you smell is almost always on the evaporator coil and in the drain pan below it.
4. Protect the electronics (5 minutes)
Wrap the control board, capacitor, and motor housing in plastic bags secured with tape. Water on these parts is the single most common cause of a unit not restarting after a cleaning.
5. Dry-clean the coils (10 minutes)
Vacuum both coils with a soft brush attachment, moving parallel to the fins, never across them. Brush loose debris out of the fan blades. This step removes 60 to 70 percent of the dust and lets the foam reach the mold underneath.
6. Straighten bent fins (10 minutes)
Match the fin comb to your coil’s fin spacing (most window units are 14 to 18 fins per inch). Insert the comb at an undamaged section and draw it gently through the bent area. Even a 10 percent improvement in open fin area is noticeable in airflow.
7. Apply foaming coil cleaner (15 minutes)
Shake the can and spray the evaporator coil from 6 to 8 inches away until the fins are covered in foam. Work from top to bottom and get the back side if you can reach it. Let the foam sit 10 to 15 minutes; it expands into the fins, lifts mold and biofilm, and begins to liquefy. Do the condenser coil at the back the same way; it is usually dirt rather than mold, but it affects efficiency just as much.
8. Rinse gently (10 minutes)
Using a spray bottle or a hose on the finest mist setting, rinse the foam from the coil in the direction the fins run. Keep the water away from the bagged electronics and the motor. Dirty water will collect in the base pan; tip the unit slightly toward its drain hole so it runs out. Repeat the foam and rinse if the fins still show dark streaks.
9. Clean the drain pan and channel (15 minutes)
The base pan under the evaporator is where mold lives. Scoop out any sludge with a paper towel, then spray the pan with 3 percent hydrogen peroxide and scrub with a brush. Run a pipe cleaner or zip tie through the drain hole and any channel that leads to the rear of the unit until water flows freely. Rinse and let drain.
10. Clean the fan and housing (10 minutes)
Wipe the blower wheel blades with a cloth dampened in peroxide, one blade at a time. Wipe the interior plastic housing and the air discharge louvers where a black film often forms.
11. Dry completely (4 to 24 hours)
Leave the unit open in the sun or a ventilated space for at least 4 hours; overnight is better. Every internal surface must be dry before power is restored. Wash the filter and grille during this time and let them dry too.
12. Reassemble and test (20 minutes)
Remove the plastic bags, slide the cabinet on, replace the screws, install the filter and grille, and set the unit back in the window with a slight outward tilt so condensate drains. Plug in and run on fan-only for 10 minutes, then switch to cool. A faint cleaner scent for the first hour is normal; a musty smell is not.
Mistakes to Avoid
- Using bleach on the coil. It corrodes aluminum fins and copper tubing and the fumes are hazardous in a confined cabinet.
- Pressure washing. Even a low setting folds fins flat and can drive water into the motor.
- Skipping the drain pan. The coil looks clean but the mold reservoir below it reseeds the unit in weeks.
- Rinsing across the fins instead of along them. It bends fins and traps debris.
- Powering up while damp. Water on the capacitor or board can short the unit or trip a breaker.
- Forgetting to tilt the unit on reinstall. Standing water in the pan is what started the mold.
- Cleaning only the evaporator. A dirty condenser coil at the back raises power draw by 10 to 20 percent.
How Often
Do a full deep clean once a year, ideally in spring before the first hot week. Rinse or vacuum the filter every 2 to 4 weeks during cooling season, and run the unit on fan-only for 15 to 30 minutes before shutting it off for the night; this dries the coil and is the single most effective mold prevention step. In humid climates or homes with pets, a mid-season foam-and-rinse of the evaporator coil through the front grille, without full disassembly, keeps the smell away. At the end of the season, run fan-only for an hour, then cover or store the unit dry.
When to Call a Pro or Replace
If mold returns within a month of a proper cleaning, the drain is likely blocked or the unit sits level instead of tilted; check both before spending money. Call a technician if the coil shows green or white corrosion crust, if the fins are so oxidized they crumble under the comb, or if the unit trips a breaker after drying fully. A professional cleaning runs $80 to $150, which is close to the price of a new 5,000 BTU unit at $130 to $170. For a unit over 8 to 10 years old, one with visible refrigerant oil stains, or one whose compressor cycles erratically, replacement is the better use of the money; new inverter models in 2026 use 30 to 40 percent less power and are far quieter.
FAQ
Can I clean the coils without removing the unit from the window?
You can do a light clean: remove the front grille and filter, vacuum the evaporator, spray foam cleaner, and let condensate rinse it during the next run. That handles surface dust and mild odor. Mold in the drain pan and on the fan blades requires pulling the unit and opening the cabinet.
Is vinegar a safe alternative to coil cleaner?
Diluted vinegar is mild enough for aluminum in a pinch, but it does not foam into the fins or dissolve biofilm the way a purpose-made cleaner does, and the smell lingers. A $14 to $18 can of coil cleaner does the job better and lasts two cleanings.
How do I know the smell is mold and not something else?
Mold produces a musty, earthy odor that is strongest in the first minute after the compressor starts. A sharp chemical or burning smell points to an electrical problem and means you should unplug the unit and stop using it. A sweet or oily smell can indicate a refrigerant leak.
Why does the unit still drip inside after cleaning?
Either the drain hole is still partly blocked or the unit is level or tilted inward. Reseat it with a quarter inch of outward slope per foot of depth and re-check the drain channel with a zip tie.