
Key takeaways
- Measure vertically first, horizontally second. Overhead pressing inside a cage needs the rack height plus your arm extension plus a few inches of margin. If you have under 90 inches, a squat-height rack or standalone stands will serve you better than a cage you can’t press in.
- Count the walk-out space, not just the footprint. A rack that occupies 16 square feet functionally claims closer to 35 once you account for stepping back with a loaded bar and racking it without clipping the upright.
- Decide whether safeties are negotiable. If you train alone and push close to failure, spotter arms or J-cups with catch pins change the ceiling on how hard you can work. Bare stands are fine for technique work and moderate loads; they are less forgiving at a genuine grinder.
- Check the hole spacing and pin style. Wider spacing between adjustment holes means the bar sometimes sits an inch too high or too low for a bench press. Look for 2-inch or tighter increments in the bench range if pressing is a priority.
- Plan the attachments before you buy the frame. Lat towers, dip bars, and landmine posts are keyed to specific upright dimensions and hole patterns. Buying the frame that matches the attachment you want in six months is cheaper than replacing everything.
What's inside
The tape measure lies less than the product page does. Before you shop for anything with four uprights, stand where the rack will live and mark out a rectangle roughly four feet deep by five feet wide on the floor with painter’s tape. Then hold a barbell overhead at the top of a press. That second test is the one that eliminates most racks in most basements, because a 7-foot cage in a room with 84 inches of clearance and a ceiling fan in the middle is a very expensive coat rack.
CAP Barbell has been the default answer for cramped-space lifters for a long time, not because it wins on hardware finish but because the lineup spans everything from a bolt-together full cage down to a pair of independent squat stands you can shove against a wall between sessions. The steel is honest, the hole spacing is workable, and the attachment ecosystem lets you add a dip station or lat tower later instead of buying it all upfront. Below is how the configurations compare, what actually matters when your ceiling is the limiting factor, and where these racks earn their keep.
As an Amazon Associate we earn from qualifying purchases at no extra cost to you. Product prices and availability are accurate as of the date shown and are subject to change.

#1 Pick

#2 Pick

#3 Pick


#5 Pick

#6 Pick

#7 Pick

Quick Comparison
| Configuration | Floor space to plan for | Ceiling clearance | Best for | Trade-off |
|---|---|---|---|---|
| Full cage power rack | Roughly 4 ft × 4 ft plus 3 ft walk-out | About 7 ft plus room to load a bar | Solo lifters who want safeties on every rep | Permanent; won’t clear low basement joists |
| Short / squat-height cage | Similar footprint, lower profile | Around 6 ft, fan-friendly | Low ceilings where a full cage won’t stand up | No pull-up bar overhead; press from outside |
| Adjustable squat stands (pair) | Two small bases, spacing you set | Whatever your bar path needs | Shared rooms, garages that still park a car | No integrated safeties; bail carefully |
| Squat stand with spotter arms | Slightly wider than a bare stand | Low | Heavy squats without a full cage | Arms add width; check your doorway path |
| Rack plus attachments | Base footprint plus 12–18 in behind | Depends on the tower | Building a full workout in one corner | Attachments are model-specific; verify fit |
How to Choose
- Measure vertically first, horizontally second. Overhead pressing inside a cage needs the rack height plus your arm extension plus a few inches of margin. If you have under 90 inches, a squat-height rack or standalone stands will serve you better than a cage you can’t press in.
- Count the walk-out space, not just the footprint. A rack that occupies 16 square feet functionally claims closer to 35 once you account for stepping back with a loaded bar and racking it without clipping the upright.
- Decide whether safeties are negotiable. If you train alone and push close to failure, spotter arms or J-cups with catch pins change the ceiling on how hard you can work. Bare stands are fine for technique work and moderate loads; they are less forgiving at a genuine grinder.
- Check the hole spacing and pin style. Wider spacing between adjustment holes means the bar sometimes sits an inch too high or too low for a bench press. Look for 2-inch or tighter increments in the bench range if pressing is a priority.
- Plan the attachments before you buy the frame. Lat towers, dip bars, and landmine posts are keyed to specific upright dimensions and hole patterns. Buying the frame that matches the attachment you want in six months is cheaper than replacing everything.
Top Picks Reviewed
CAP Barbell Power Racks and Attachments
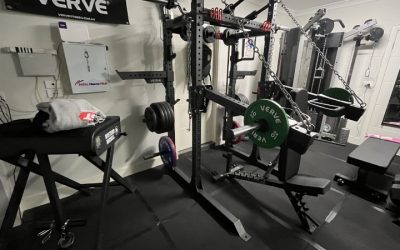
What makes this line worth a look in a tight room is its modularity. The full cage gives you four uprights, adjustable J-hooks, catch pins or spotter arms depending on the version, and a pull-up bar across the top — the complete package if your ceiling cooperates. Where it gets interesting for low-clearance spaces is the shorter squat-rack and stand options: the same steel construction and adjustment approach, but sitting low enough to duck under floor joists, ductwork, or a ceiling fan. You lose the overhead bar and the enclosed feel, and you press from a bench positioned outside the frame rather than inside it, but you keep the two functions that matter most, which are holding a barbell at the right height and catching it when a set goes sideways.
Assembly is bolt-together and generally straightforward with two people and a socket wrench; expect to snug everything, load the rack, then re-tighten after the first week as the joints settle. That’s normal for bolted racks in this class and not a defect. Rated capacities vary meaningfully between the cage and the lighter stands, so read the listing for the specific configuration rather than assuming the family shares one number — a stand rated for intermediate loads is a different animal from the heavier cage. The attachment catalog covers the usual additions: dip handles, landmine posts, lat and low-row towers, plate storage pegs that double as useful counterweight. Two practical notes: match the attachment to your exact model, and if the rack is going on a bare concrete slab, put rubber or a stall mat underneath. It reduces walking, protects the floor, and takes a surprising amount of ring out of every rep.
Where this line fits: the lifter building a serious barbell setup in a garage bay, spare bedroom, or basement corner who wants steel that holds up without paying commercial-gym pricing. Where it doesn’t: if you want a rack that folds flat against the wall between sessions, look at wall-mounted folding designs instead, because none of these configurations disappear.
Frequently Asked Questions
How much ceiling height do I actually need?
For a full cage with an overhead pull-up bar, plan on roughly 7.5 feet minimum — enough for the frame plus your head and hands under the bar. For overhead pressing inside the cage, measure your own bar-locked-out height and add four inches. If you fall short, a squat-height rack solves the problem entirely; you press outside the frame and lose nothing on squats.
Can I bolt a rack to a concrete floor?
Many bases include holes for it, and anchoring makes a noticeable difference in stability if you’re doing heavy pulls or kipping movements. It’s also permanent. If you rent, or you may reconfigure the space, skip the anchors and load plate-storage pegs instead — a couple of hundred pounds of iron on the frame does most of the same work.
Are spotter arms enough without a full cage?
For squats, yes, provided the arms are set at the right height and rated for what you lift — test the bail with an empty bar first so you know exactly how the miss feels. For bench pressing, be more conservative: a failed bench with the bar over your throat is the one scenario where a full cage with catch pins is genuinely safer.
Will attachments from other brands fit?
Sometimes, but don’t count on it. Upright tube dimensions and hole diameter and spacing all have to line up, and a near-miss means a bolt that won’t seat or a hook that rattles under load. Buy attachments listed as compatible with your specific rack model.
Final Thoughts
The rack that fits your room beats the rack with the better spec sheet every time. If your ceiling clears eight feet, the full cage is the straightforward answer — safeties, pull-up bar, and room to grow with attachments. If you’re working under joists or around a fan, drop to a squat-height rack or a pair of adjustable stands with spotter arms and accept the trade: you’ll bench outside the frame and do pull-ups elsewhere, but you’ll be squatting heavy in a space that supposedly couldn’t hold a rack. Tape the footprint on the floor, hold a bar overhead, then buy the configuration that survives both tests.
Write Your Review
No reviews yet. Be the first to share your experience!